
Airbrushing Protocol
Putnam Lab Airbrushing Protocol
Goal: To remove the tissue from the coral fragment to obtain a coral tissue homogenate <50 mL.
Written for airbrushing Montipora capitata and Pocillopora acuta fragments from the Holobiont Integration 2018 project.
Based on the following Putnam Lab Airbrushing protocols:
H. Putnam original protocol
Video Example
Required Equipment
Iwata Airbrush Set: Example
Micro-homogenizing kit: PRO Scientific
Summary Protocol
- Sterilizing equipment with 10% bleach, DI water Type II, and 70% ethanol.
- Airbrush coral fragment using ice-cold filtered sea-water.
- Record volume (mL) of the homogenate.
- Homogenize tissue slurry.
- Aliquot portions of the tissue slurry for further physiological analysis.
- Bleach the coral skeleton
- Clean up
Detailed Protocol
Set-up
Sterilizing working area:
- Rinse tweezers and scissors with:
a. 10% bleach solution
b. DI water Type II
c. 70% Ethanol - Spray tabletop with 70% and wipe down with kimwipes.
- Spray gloves with 70% ethanol and rub hands together.
Iwata Airbrush set up:
- Plug in the Iwata air compressor into the nearest outlet.
- Connect one end of the red/blue/green hose to the compressor.
The airbrush set-up is not fully broken down after each use. The compressor and airbrush will remain connected. See the photo below.
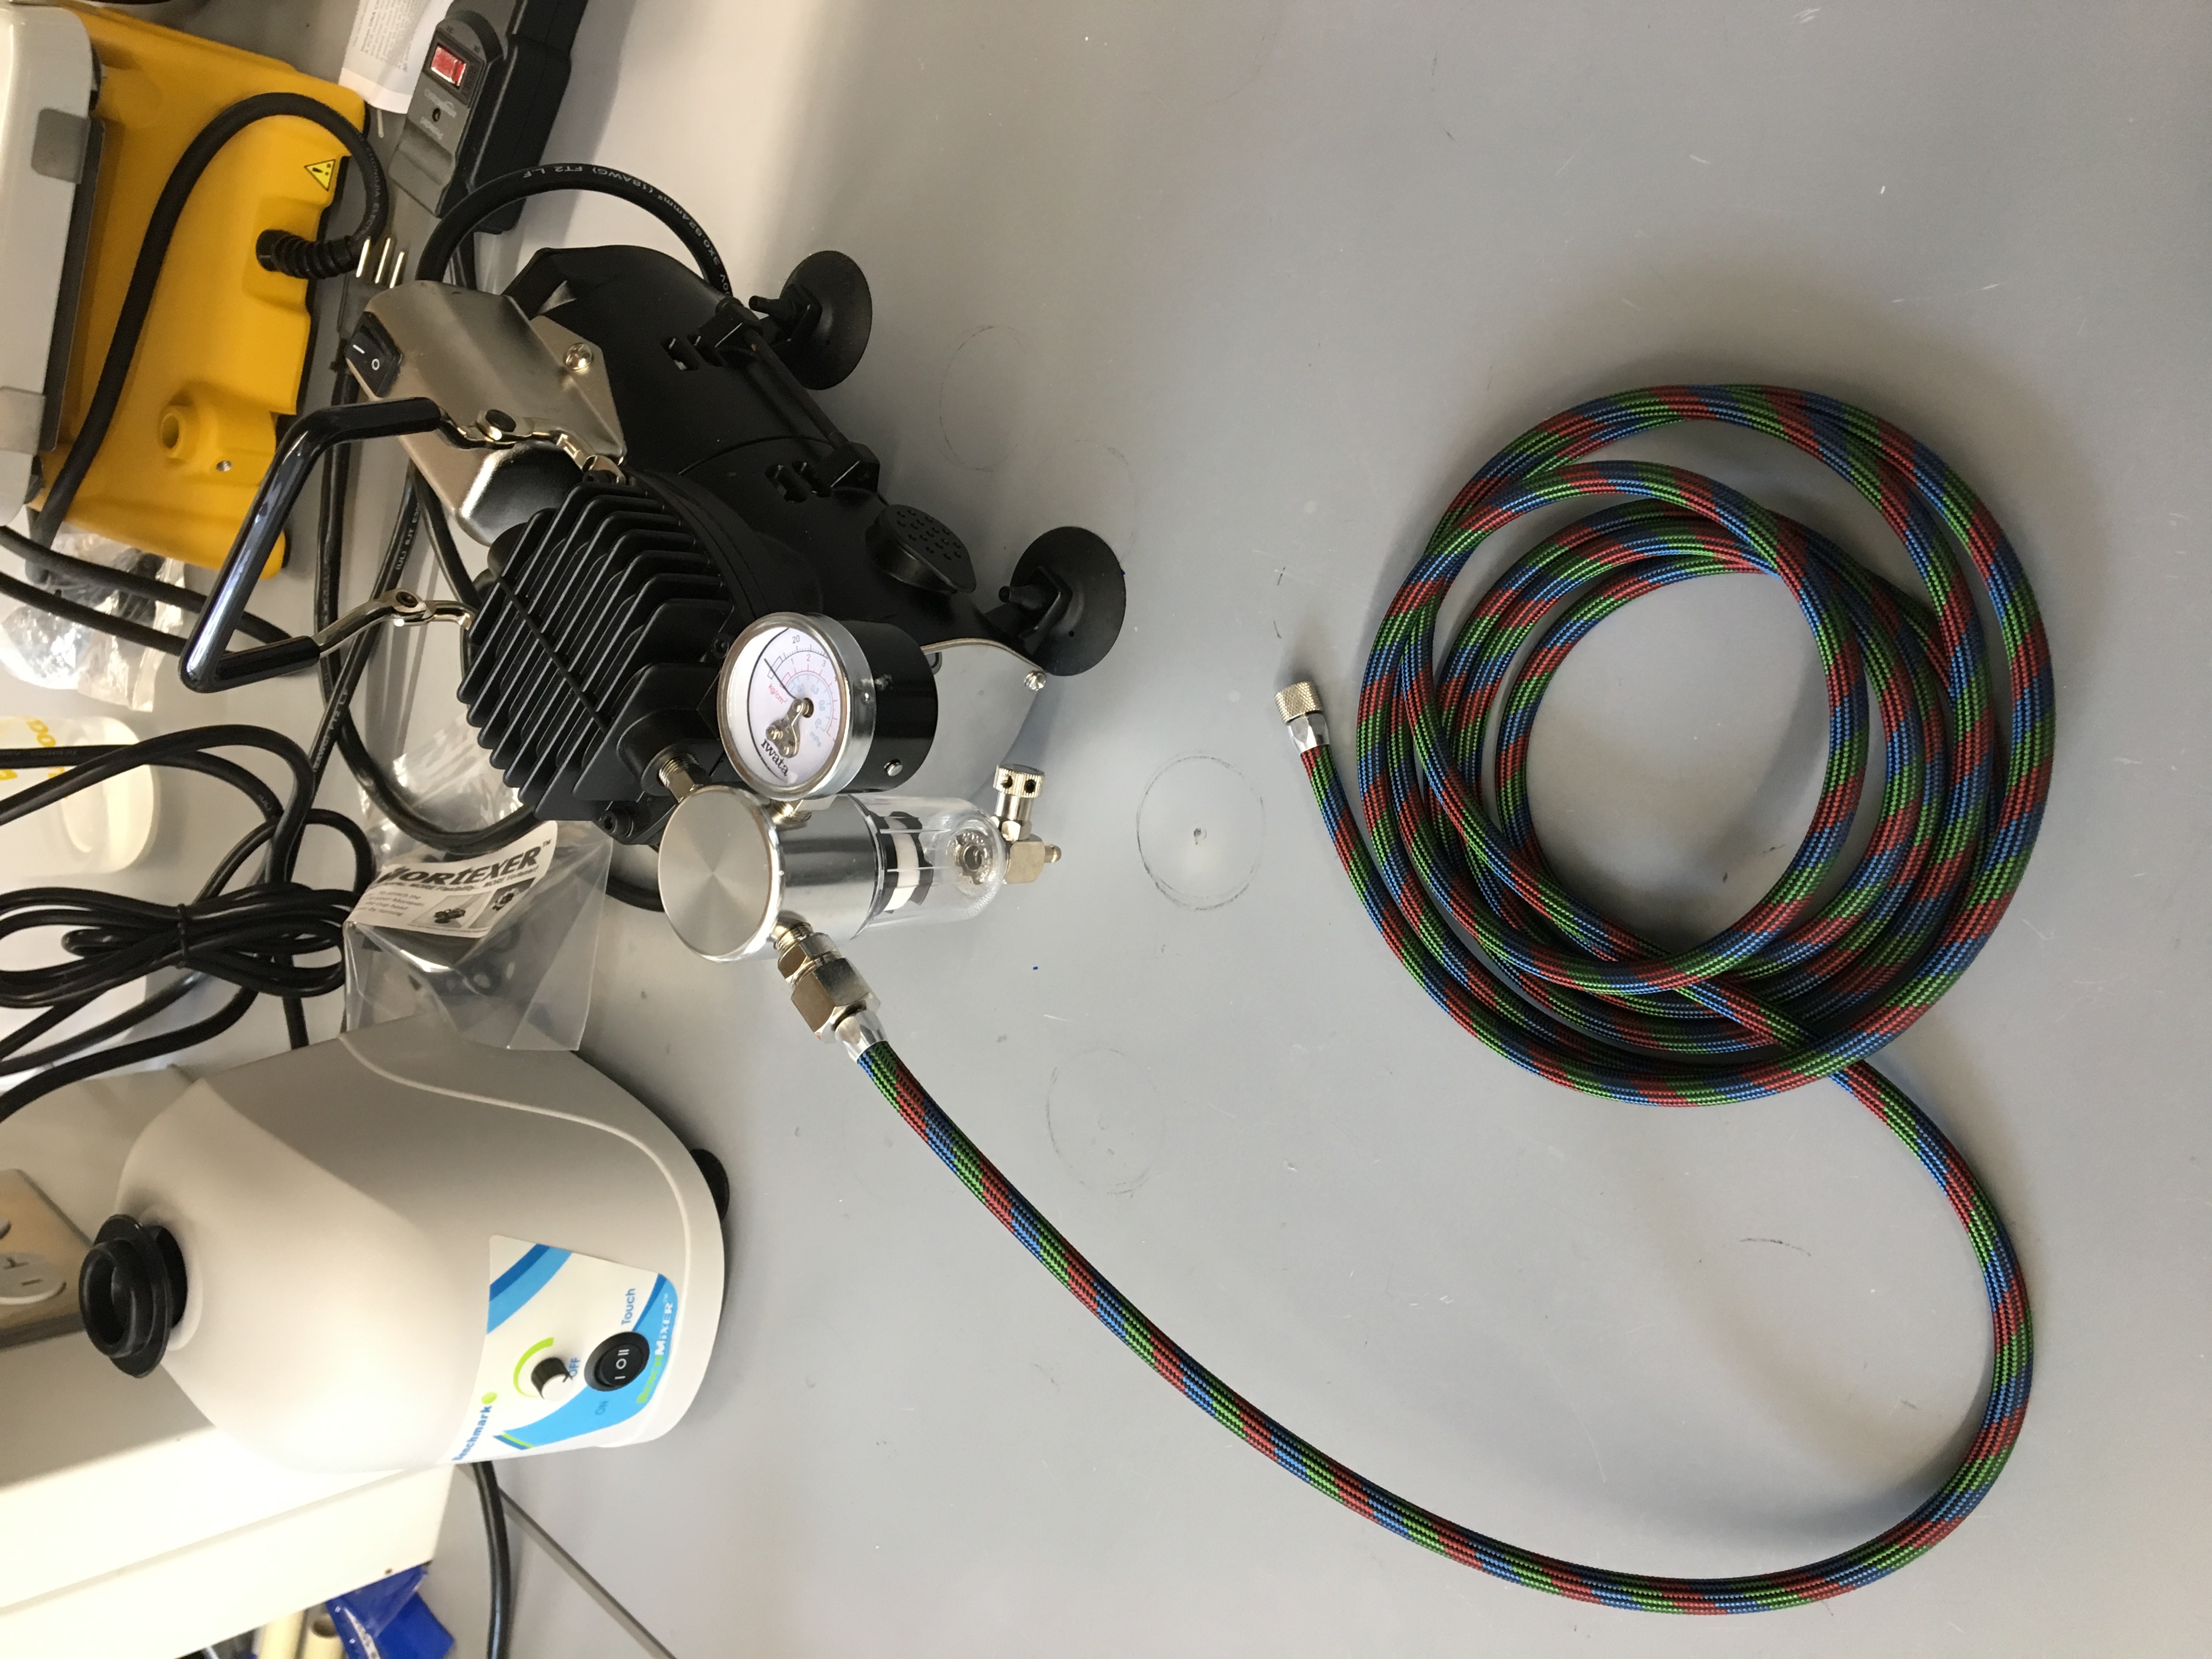
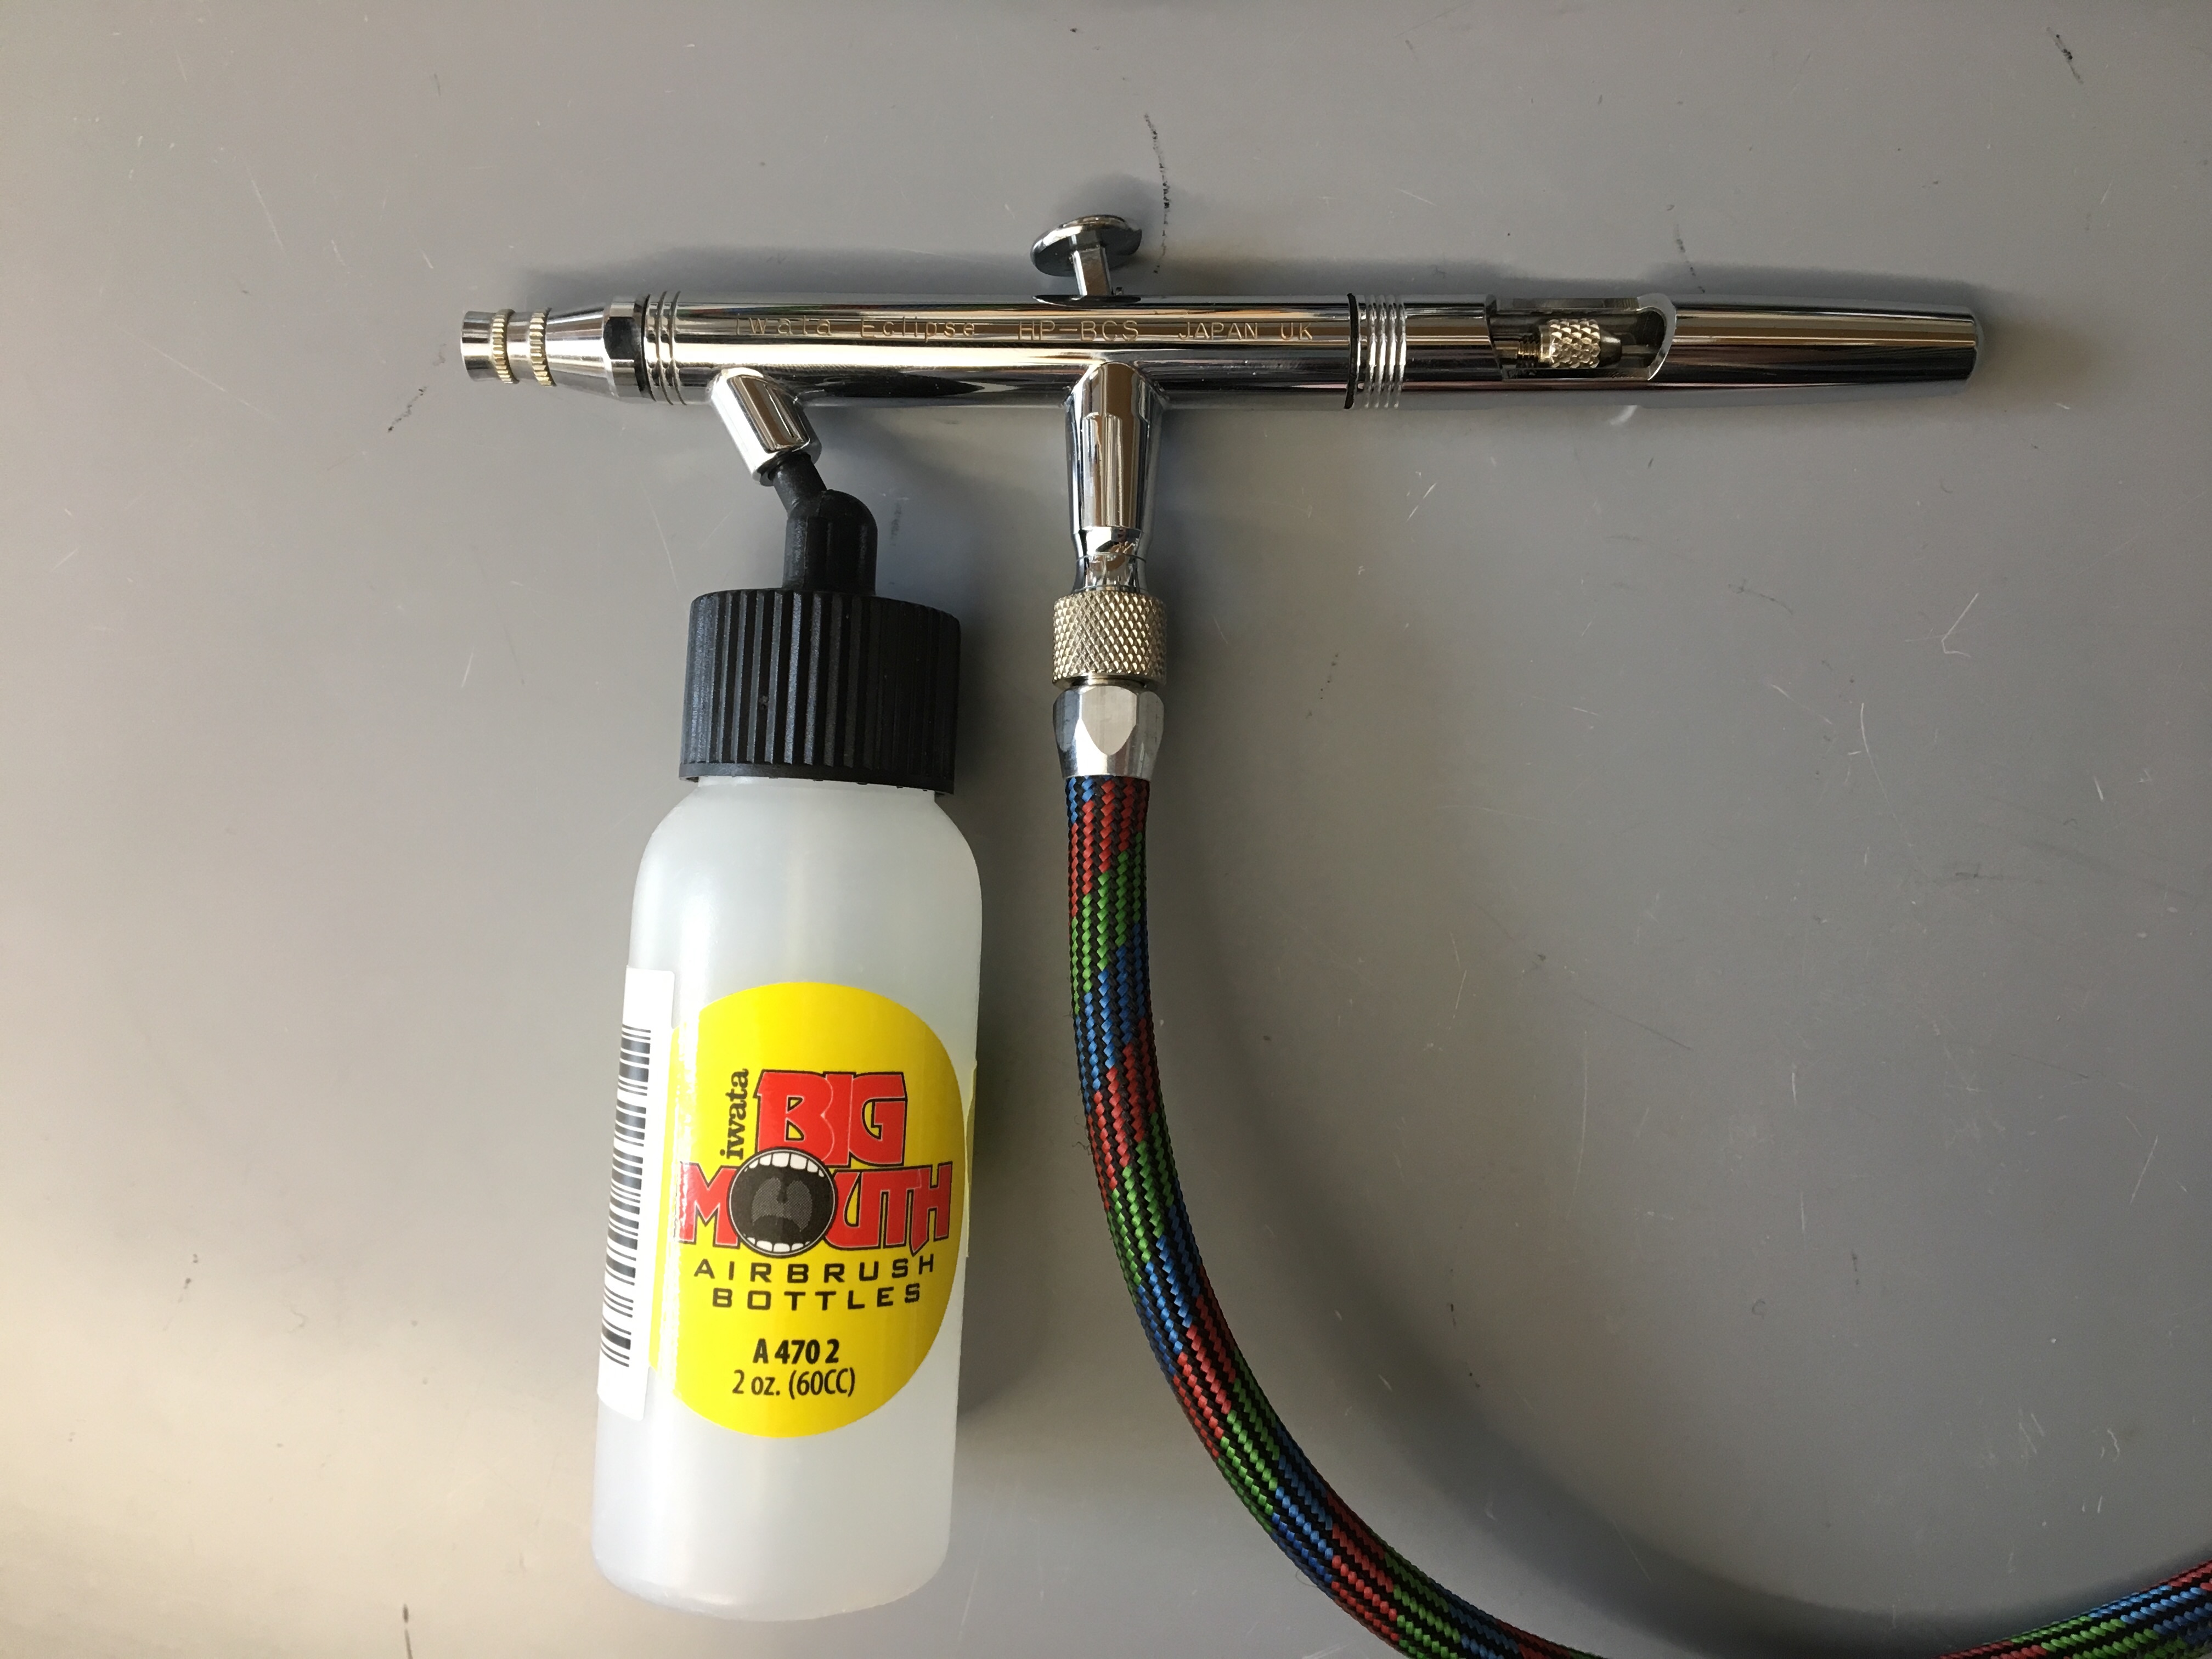
- Connect the remaining end of the red/blue/green airhose to the Iwata airbrush. See photo below. Putnam lab airbrush supplies are kept in drawer AD1.
- Fill the airbrush bottle with ice-cold PBS solution. Cap the bottle and connect to the Iwata airbrush as seen below.
- Turn on the Iwata air compressor.
- Rinsing the airbrush for 30 seconds: Aim the nozzle of the airbrush (end closest to the airbrush bottle) into an empty 100 mL beaker. Push down (pulls air from the compressor) and pull back (pulls water from the bottle) on the trigger to operate. Continue for 30 seconds to flush the airbrush.
Sample Preparation
- Label a sterile whirlpak with date of airbrushing and coral ID.
- Take the coral fragment out of the -80°C freezer.
Once the coral fragment is taken from the freezer, the following steps need to be done timely (not rushed) because higher temperatures will degrade the protein and tissue. - Using the sterilized tweezers, transfer the coral fragment to the new sterile whirlpak.
Airbrushing
- Using the sides of the whirlpak, hold the coral fragment in the whirlpak (never touch the fragment with your gloves).
- With your other hand, hold the airbrush so that you are able to push down and pull back on the trigger only using one hand.
- Hold the airbrush nozzle at least an inch above the coral fragment so that the polyps and sharp structure of the coral does not damage the fragile airbrush pieces.
- Push down and pull back on the trigger to operate the airbrush, hovering over a section of tissue to clear the skeleton before releasing moving on to another section.
In order to airbrush the entire coral, user will have to rotate the fragment throughout the protocol. Hold the whirlpak and coral fragment so that the opening of the whirlpak faces upwards to avoid losing tissue solution. The white, calcium carbonate skeleton of the coral will start to show. It can be difficult to airbrush every single portion of tissue off of the fragment due to the porous nature of coral structure. Airbrush until the fragment is as white as possible.
Homogenate collection
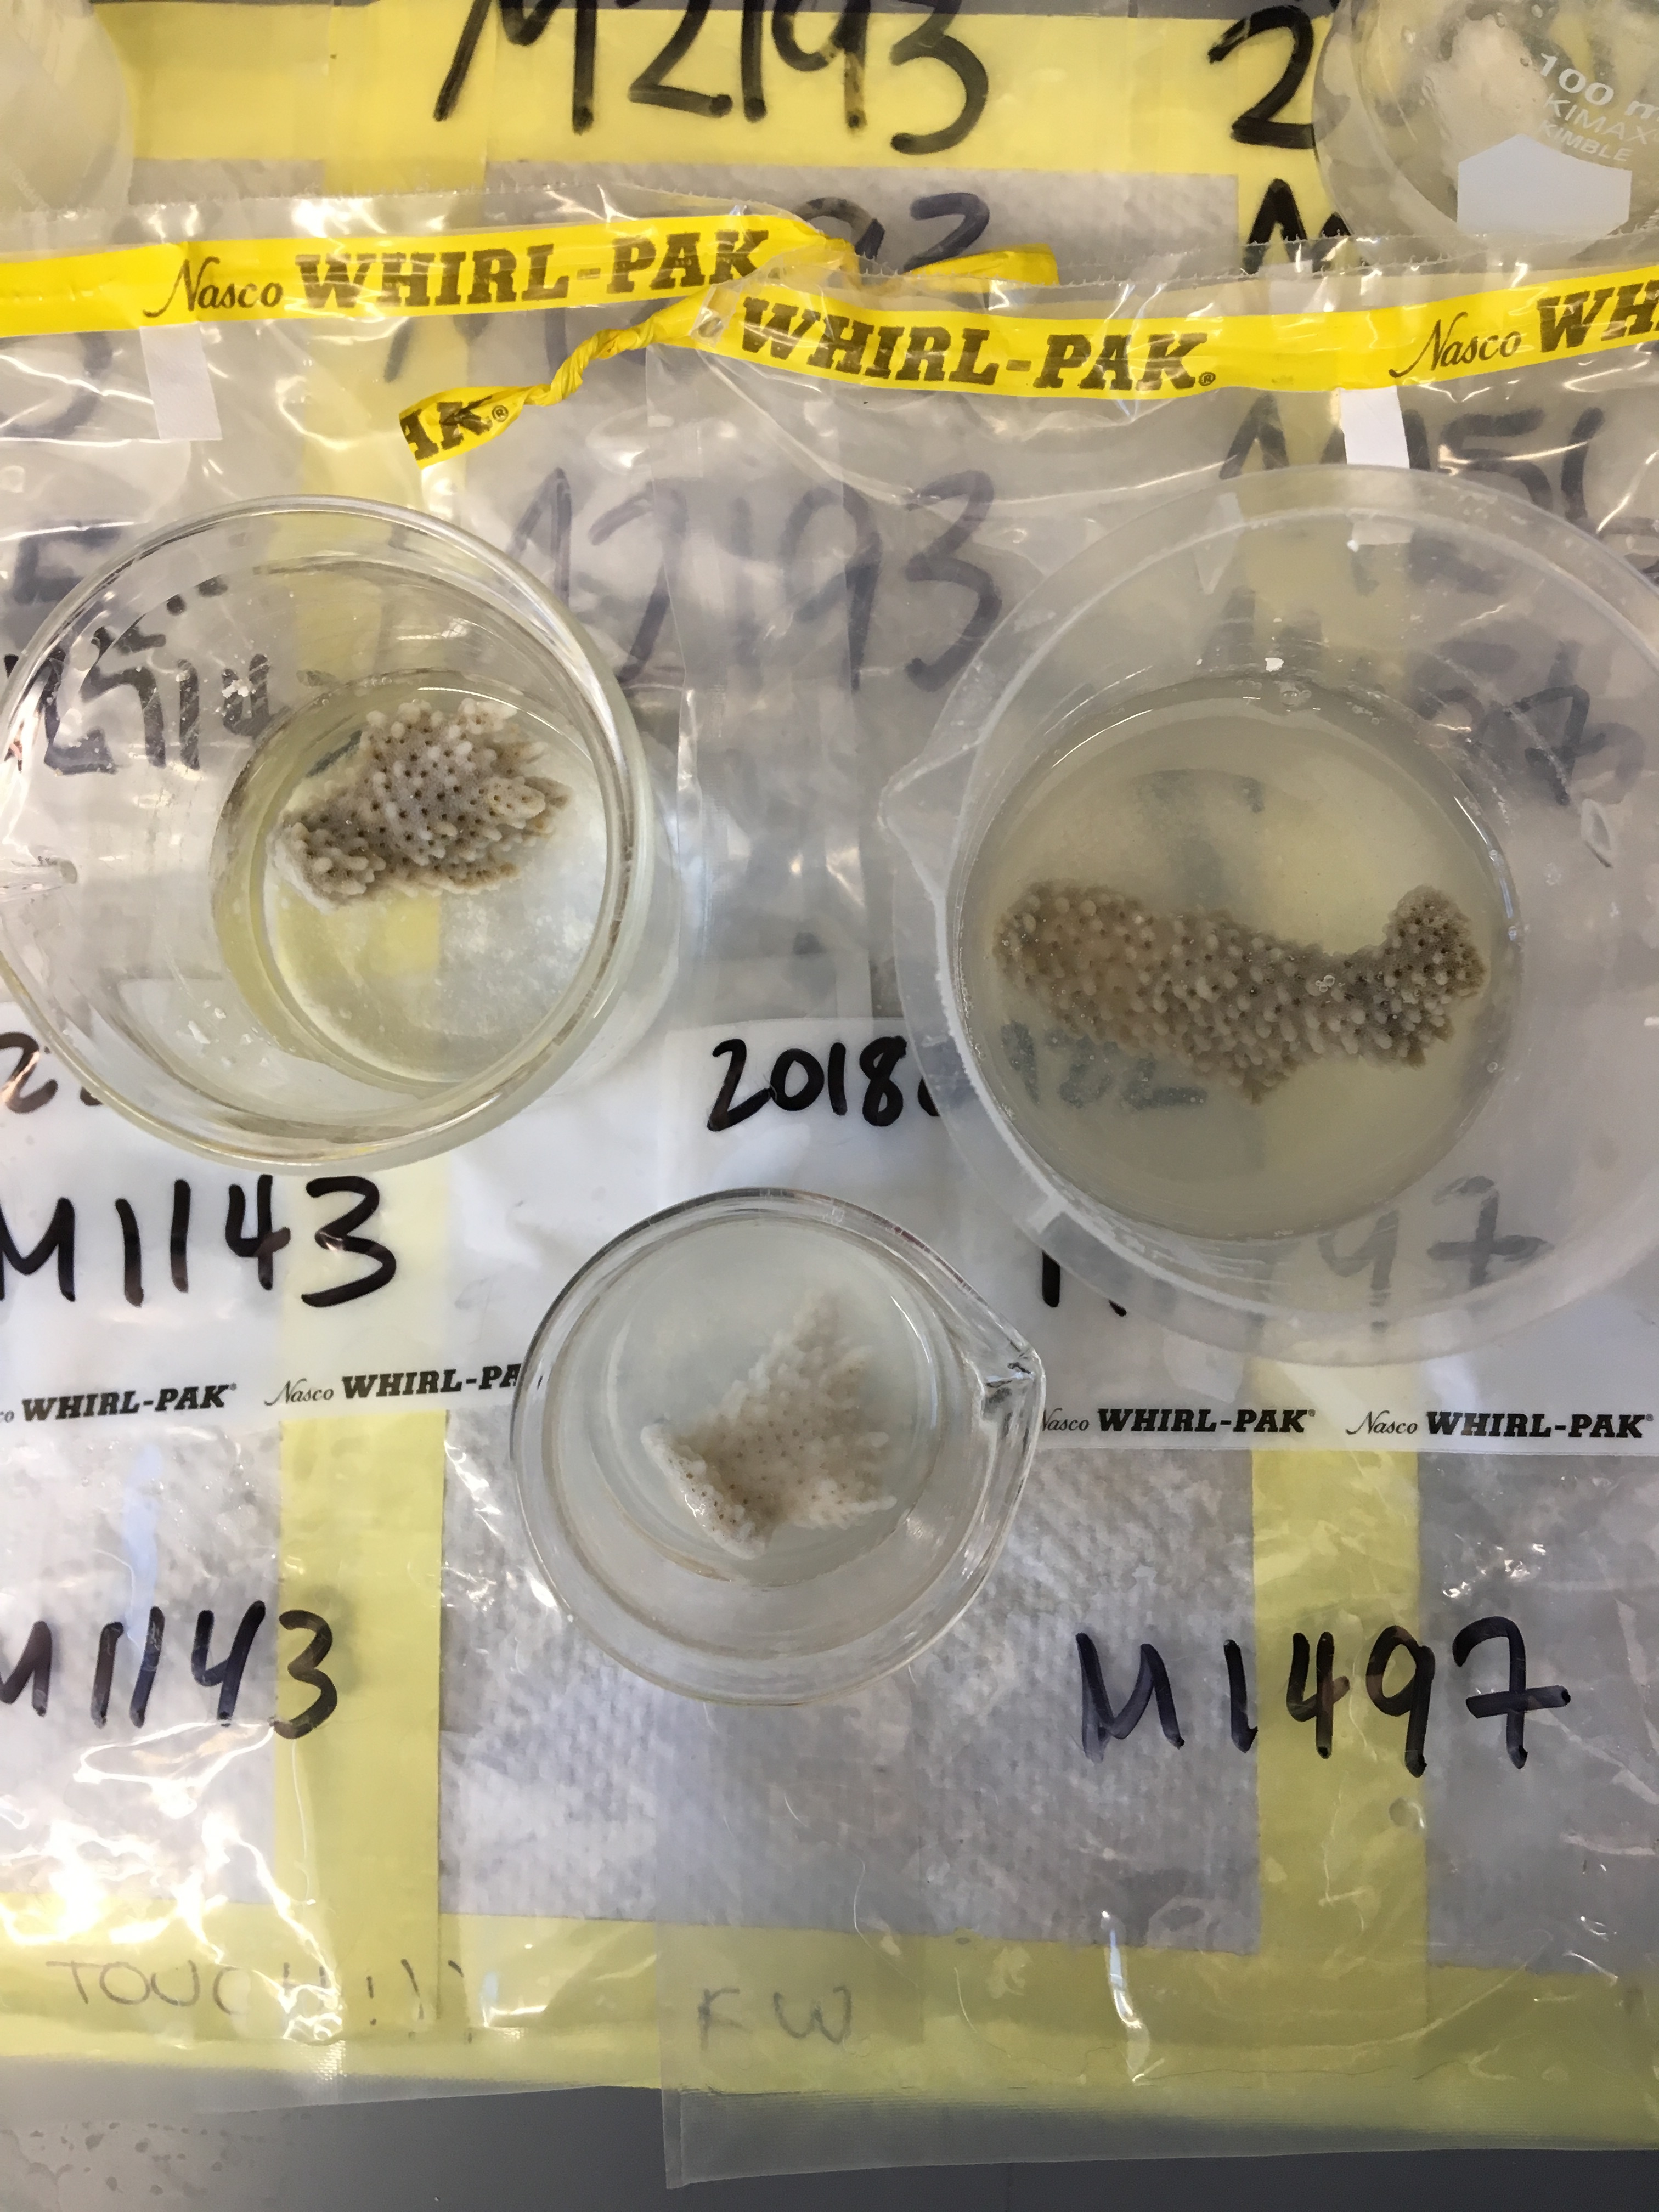
- Using the tweezers, transfer the coral skeleton from the new labeled whirlpak to the original sampled whirlpak. Be careful not to tilt the whirlpak and lose tissue homogenate.
- Tilt the whirlpak containing the tissue homogenate slightly to the left so that the homogenate aggregrates in one corner of the bag.
- Using sterilized scissors, cut the bottom right hand corner of the whirlpak.
- Gently pour the homogenate out of the whirlpak into a 50 mL falcon tube.
- Label the falcon tube with the airbrushed date, coral ID, your initials, and the coral sampling date.
- Record the volume (mL) of homogenate.
Homogenization
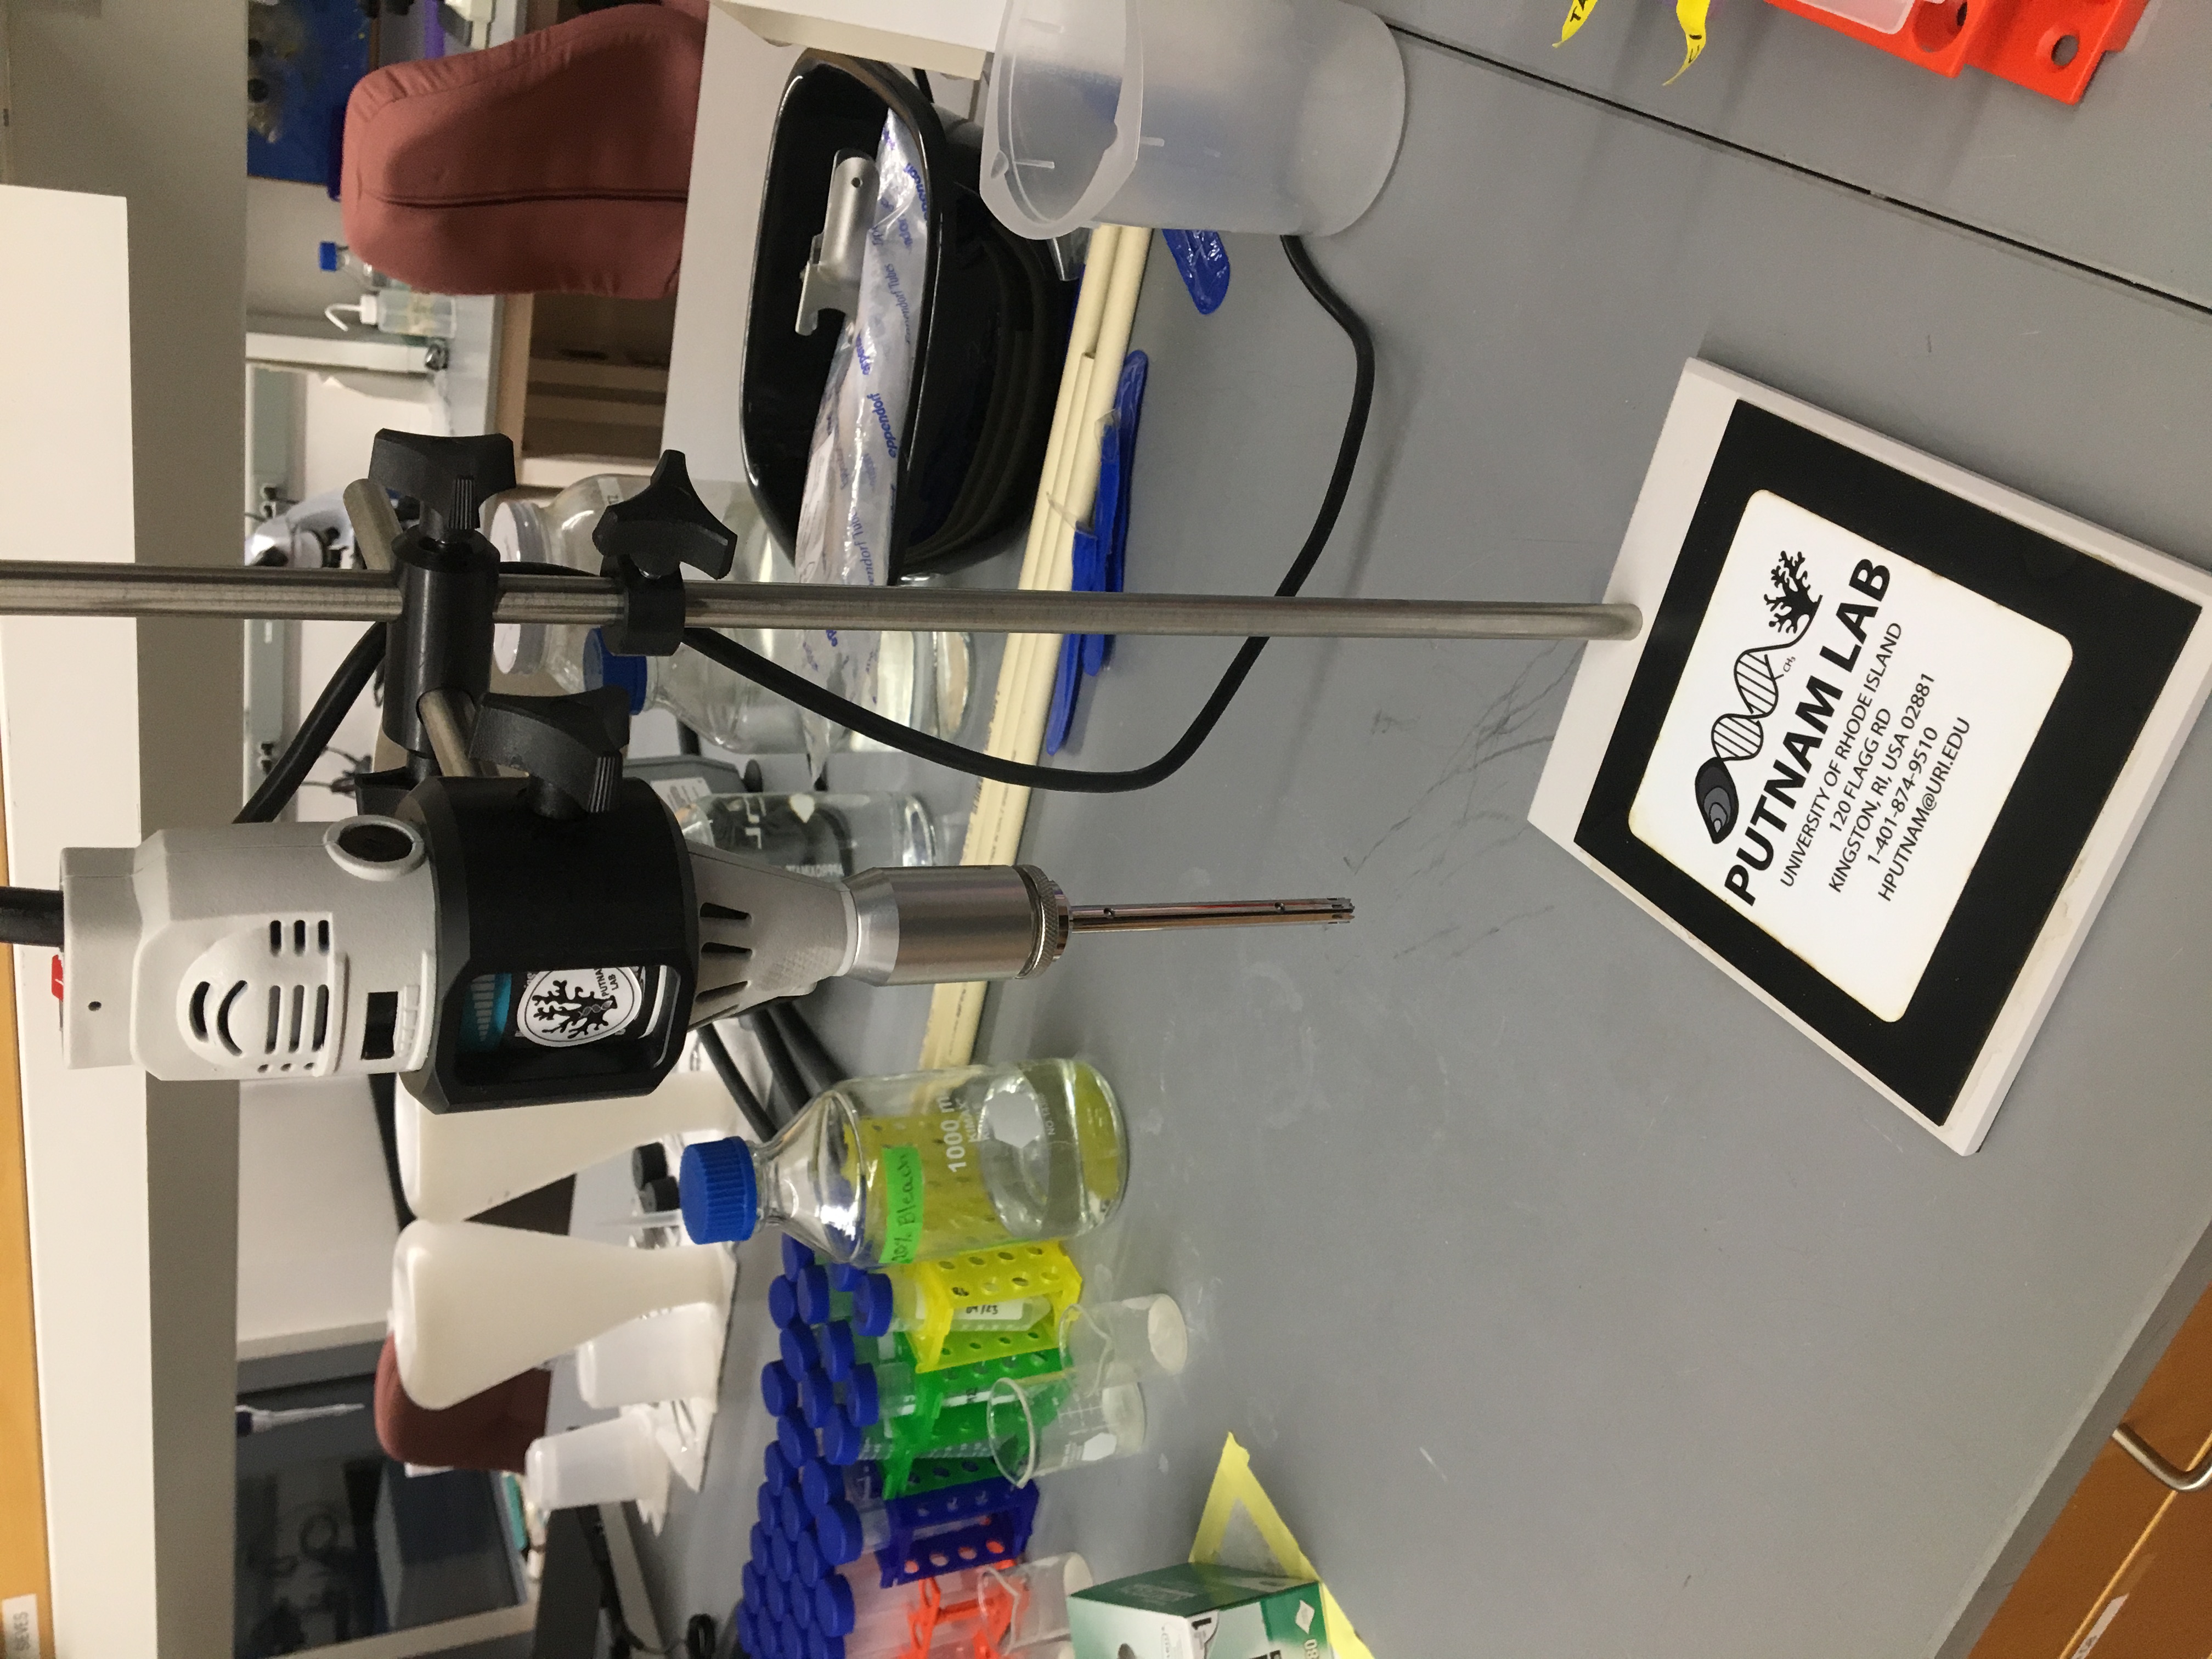
- Plug in the micro-homogenizer set up to the nearest outlet and connect the large micro-homogenizer piece to reflect the set up below.
- Fill two 15 mL falcon tubes with DI water II (labeled “DI water II”, your initials, and date made), a 15 mL falcon tube with 50% bleach (labeled “50% bleach”, your initials, and date made), and a 15 mL falcon tube with 70% ethanol (labeled “ethanol”, your initials, and date made).
- Sterilize the microhomogenizer by dipping the piece in the appropriate 15 mL falcon tube in this order:
- DI water II
- 10% bleach
- DI water II
- 70% ethanol
- DI water II
- Wipe down with a kimwipe.
- Place the microhomogenizer in the coral tissue homogenate 50 mL falcon tube and turn on starting at a low speed. Gradually increase the speed of the microhomogenizer to fully homogenize the tissue slurry.
Aliquot
- Label 3 1.5 mL microcentrifuge tubes with the coral ID on the cap and side. Label one tube “TP/TAC”, one “Zoox”, and the last one “Chl”.
- Aliquot 1 mL of tissue homogenate into the “Chl” tube.
- Aliquot 1 mL of tissue homogenate into the “TP/TAC” tube.
- Aliquot 500 μl of tissue homogenate into the “Zoox” tube.
- Place the 50 mL homogenate stock falcon tube in the -80°C freezer in the designated homogenate stock freezer bag.
- Place the “Zoox” tube in the -80°C freezer in the designated Host Total Protein and TAC assay freezer box.
- Place the “TP/TAC” tube in the -80°C freezer in the designated Host Total Protein and TAC assay freezer box.
- Centrifuge the “Chl” microcentrifuge tube at 13,000 x rcf for 3 minutes.
- Discard the supernatant from the “Chl” tube and place the “Chl” tube in the -80°C freezer in the designated Chlorophyll assay freezer box.
Bleaching
- Label an empty 100 mL beaker with a piece of tape labeled with the coral ID, “20% bleach”, date of bleaching.
- Using the sterilized tweezers, transfer the skeleton from the whirlpak to the beaker. The skeleton needs to be completely free of coral tissue and as white as possible.
- Pour enough 20% bleach to cover the entire skeleton.
 .
.
- Leave for 24 hours.
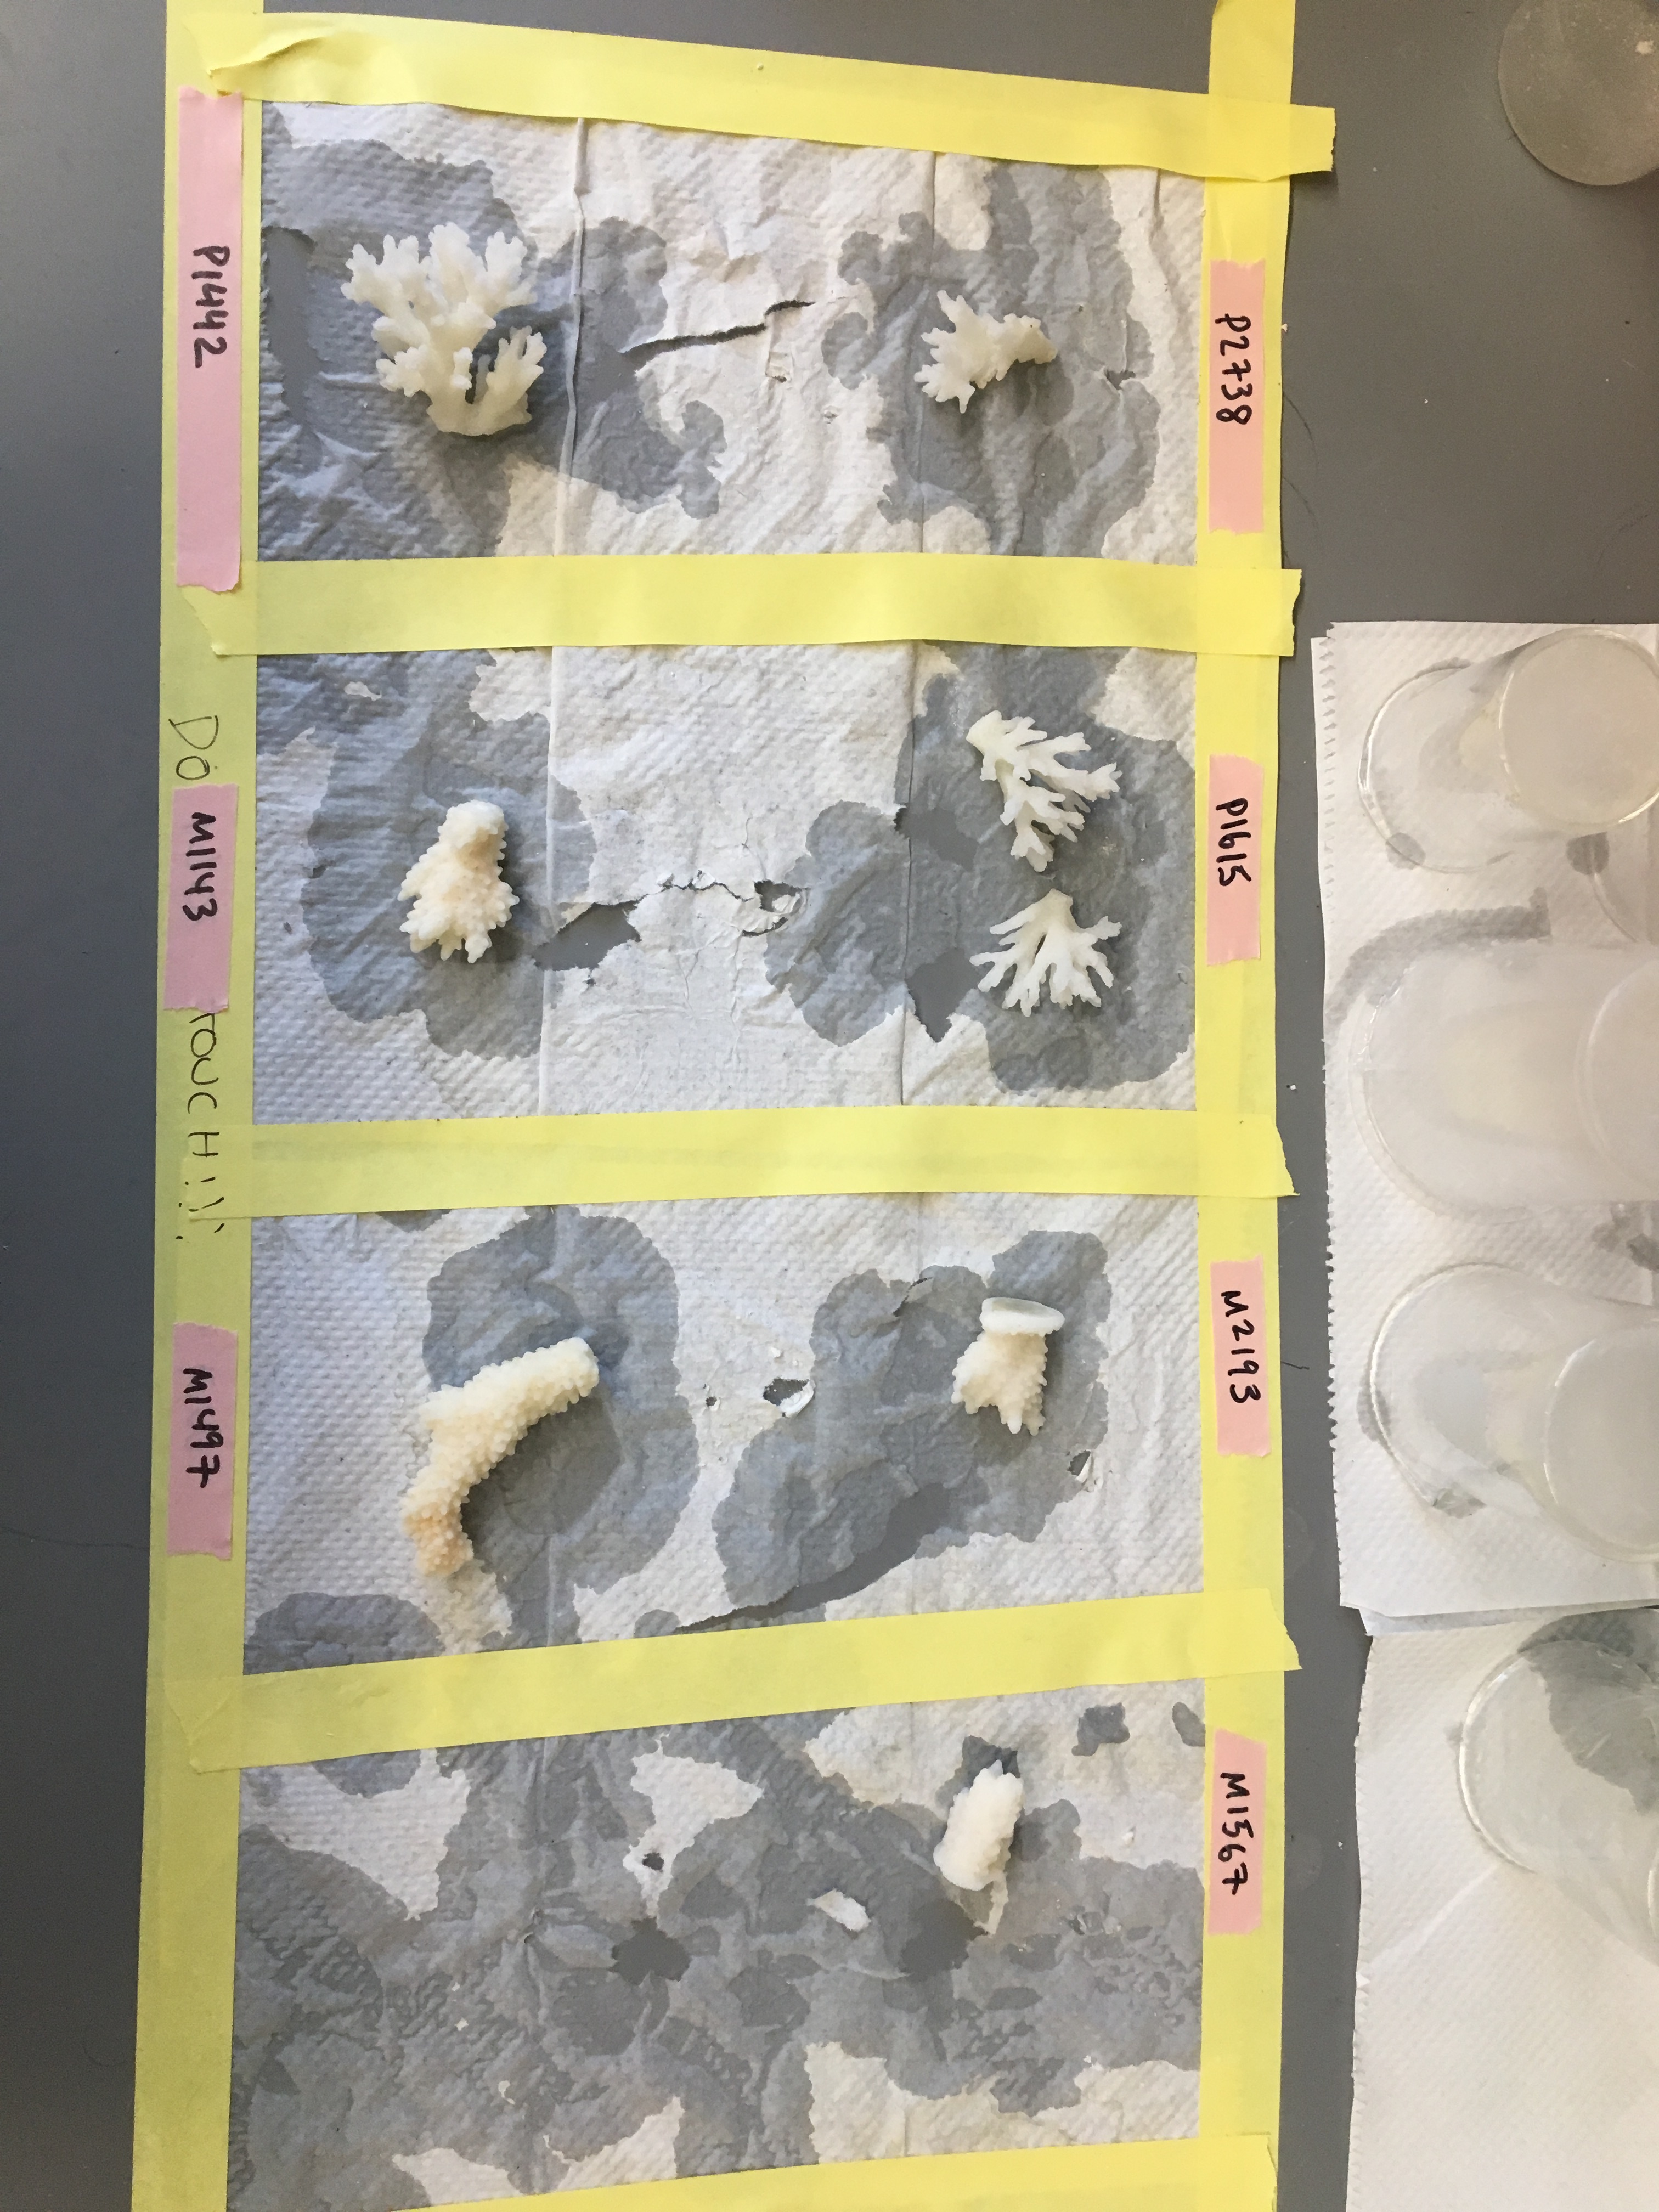
- After 24 hours has past, use sterilized tweezers to remove the coral fragment from the beaker and place on a paper towel. Take the labeled piece of tape from the beaker and place under the coral fragment. Take a photo of the coral fragments just in case the fragments get bumped around.
 .
.
- Let dry for 24 hours until completely dry. Alternatively, skeletons can be placed in the drying ovens until dry.
- After completely dry, use the sterilized tweezers to move the skeleton from the paper towel to a ziploc bag labeled with the coral ID.
- Store the coral skeletons in the cardboard box above the microscopes labeled “Emma Coral Fragments”.
Clean-up
- Sterilize all scissors and tweezers used throughout the protocol.
- Disconnect the Iwata airbrush set-up.
- Disconnect the homogenization set-up.
- Wipe down benchtop with 70% ethanol.
- Throw away any garbage produced throughout protocol.
- Empty any full tips containers and restock equipment and solutions as needed.
Written on October 22, 2019